
前言:
這是一篇為了 04/18 跟 Google Developer Group 合作的 BUILD WITH AI (BWAI) WORKSHOP 的第二篇系列文章(不知道還需要幾篇)。
本篇文章將專注在以下幾個部分:
- Firebase Database 設定
- 如何在 Cloud Function 上透過官方 Golang 存取 Firebase
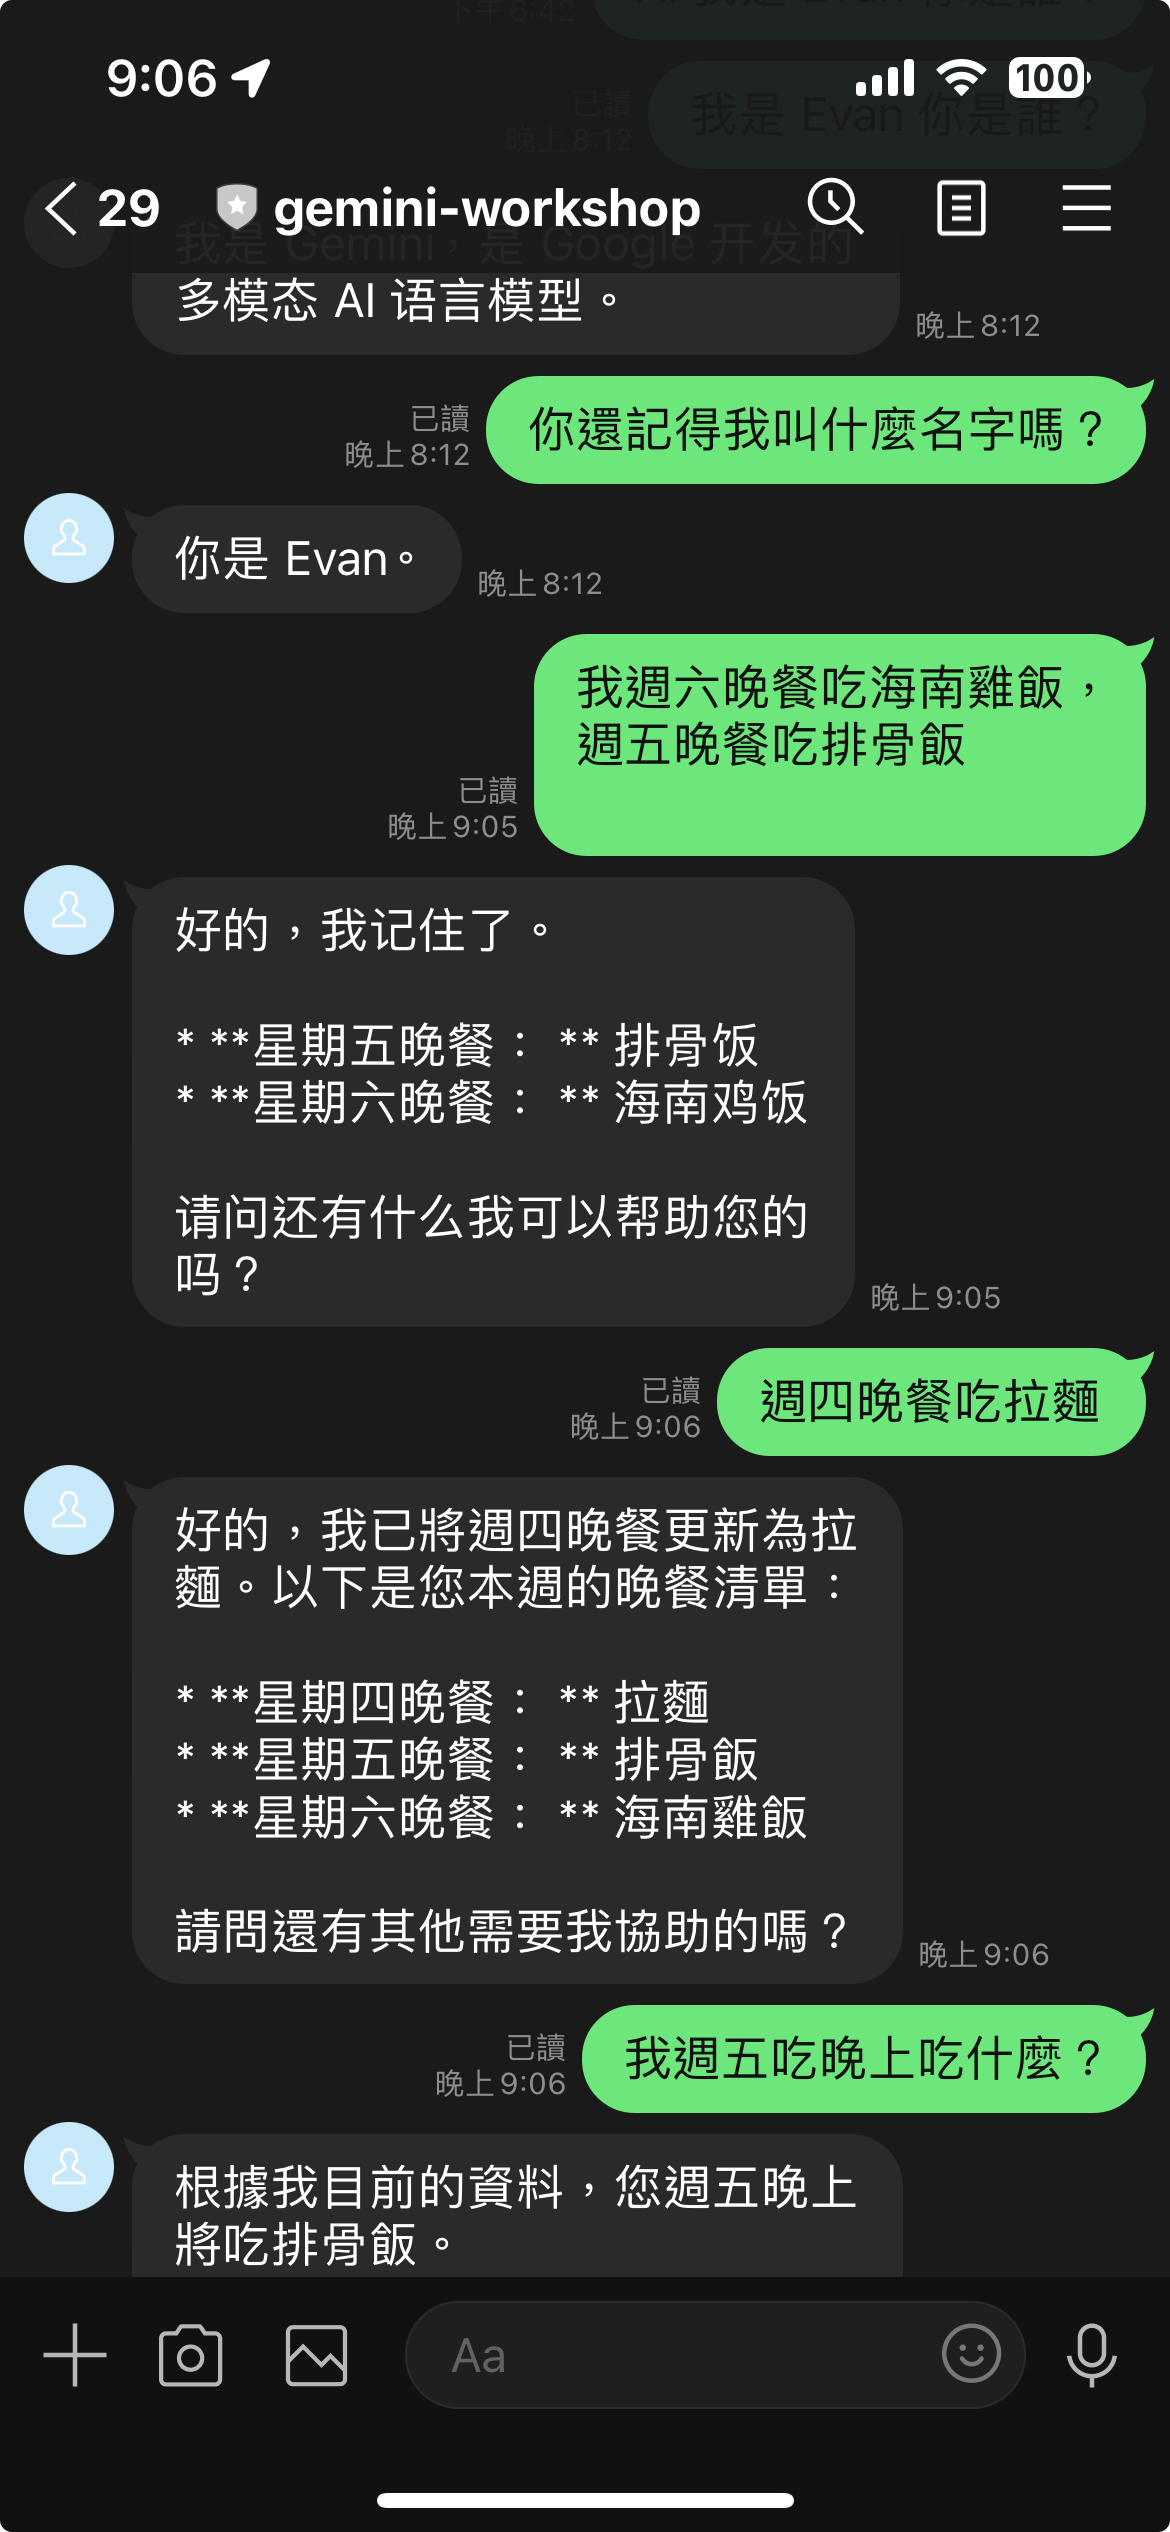
- 透過 Firebase Database 來讓你的 Gemini 記住所有講過的事情,優化上一次打造的 LINE Bot
文章列表:
- [BwAI workshop][Golang] LINE OA + CloudFunction + GeminiPro + Firebase = 旅行小幫手 LINE 聊天機器人(1): 景色辨識小幫手
- [BwAI workshop][Golang] LINE OA + CloudFunction + GeminiPro + Firebase = 旅行小幫手 LINE 聊天機器人(2): Firebase Database 讓 LINEBot 有個超長記憶
- [BwAI workshop][Golang] LINE OA + CloudFunction + GeminiPro + Firebase = 旅行小幫手 LINE 聊天機器人(3): 導入名片小幫手跟收據小幫手
- [BwAI workshop][Golang] LINE OA + CloudFunction + GeminiPro + Firebase = 旅行小幫手 LINE 聊天機器人(4): 關於 Gemini Pro 伺服器的相關修改導致 unknown field
usageMetadata的錯誤訊息
事前準備
- LINE Developer Account: 你只需要有 LINE 帳號就可以申請開發者帳號。
- Google Cloud Functions: GGo 程式碼的部署平台,生成供 LINEBot 使用的 webhook address。
- Firebase:建立Realtime database,LINE Bot 可以記得你之前的對話,甚至可以回答許多有趣的問題。
- Google AI Studio:可以透過這裡取得 Gemini Key 。
申請 Firebase Database 服務
-
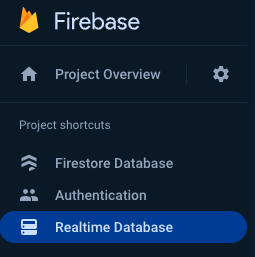
記得到 Firebase Console,直接選取你現在有的專案。(可能叫做 My First Project?)
-
建立一個 Firebase Realtime Database 等等會用到
-
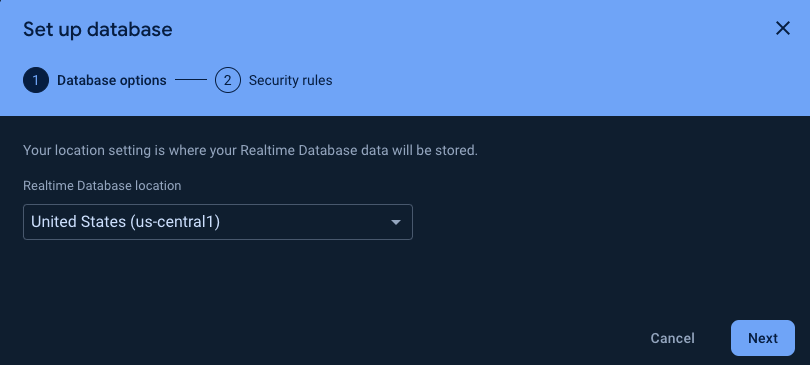
地區選美國
-
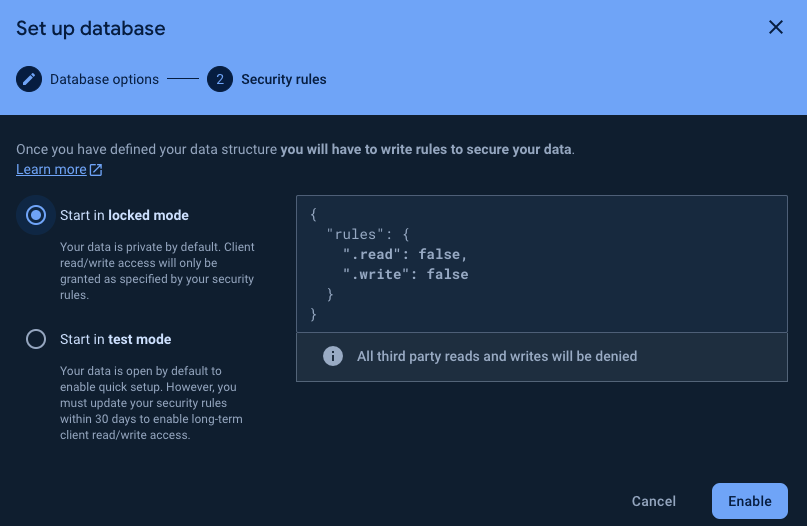
Start in “lock mode”
-
為了開發方便,到 “Rules”設定成可以寫跟讀取,千萬注意:
- 這是為了測試,請勿用在對外環境
- 這是為了測試,請勿用在對外環境
- 這是為了測試,請勿用在對外環境
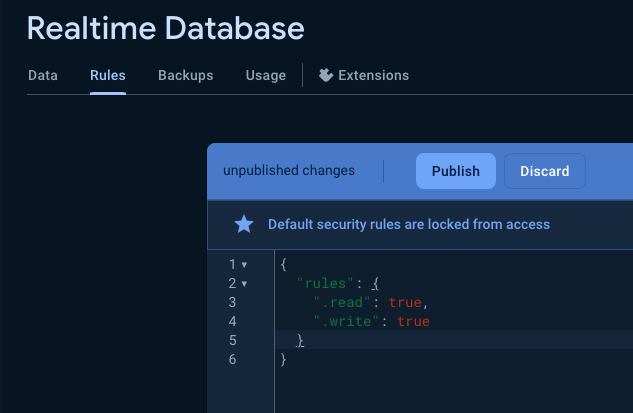
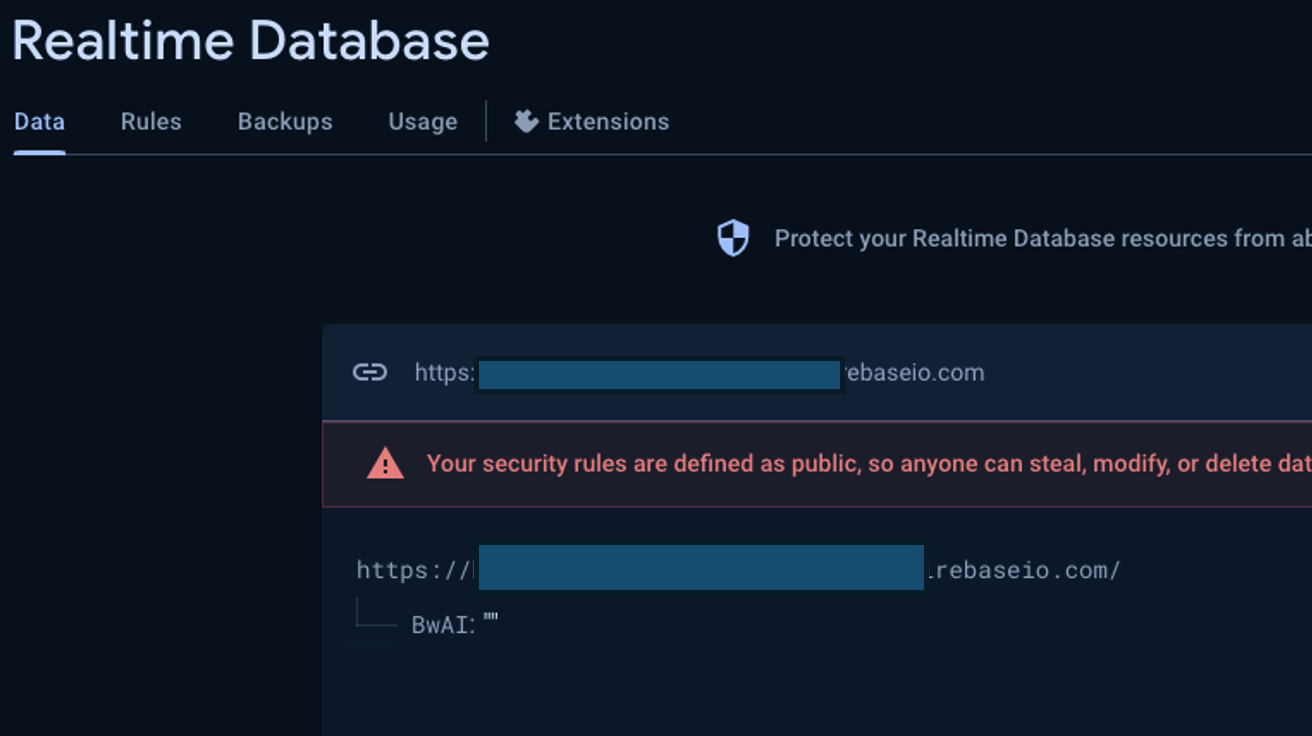
- 記住哪個 URL (注意!之後要正式上線,需要改回權限),並且加上一個項目: “BwAI”
申請 Services Account Credential 讓 Cloud Function 連接 Google 服務
這部分的教學,其實可以參考我另外一篇文章。[學習文件] 如何在 Heroku 上面使用透過 Golang 來存取 Google Cloud 服務,但是這邊還是快速走一次。
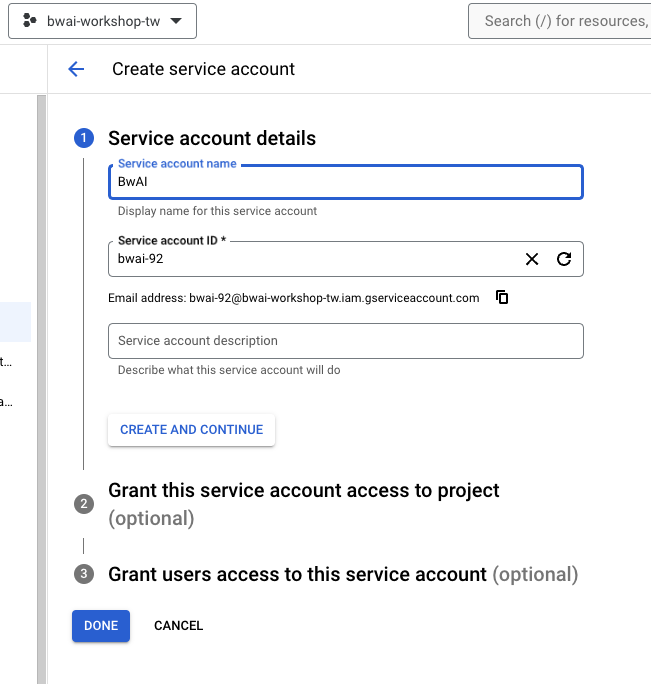
- 進入 Google Cloud Console ,到 IAM & Admin 選擇建立 Services Account

- Services Account Name 自己決定,要注意好 (上面專案跟 Firebase 專案名稱要一致)
- Grant this service account access to project 在身份的時候,建議先用 Editor (比較大,需要小心使用)
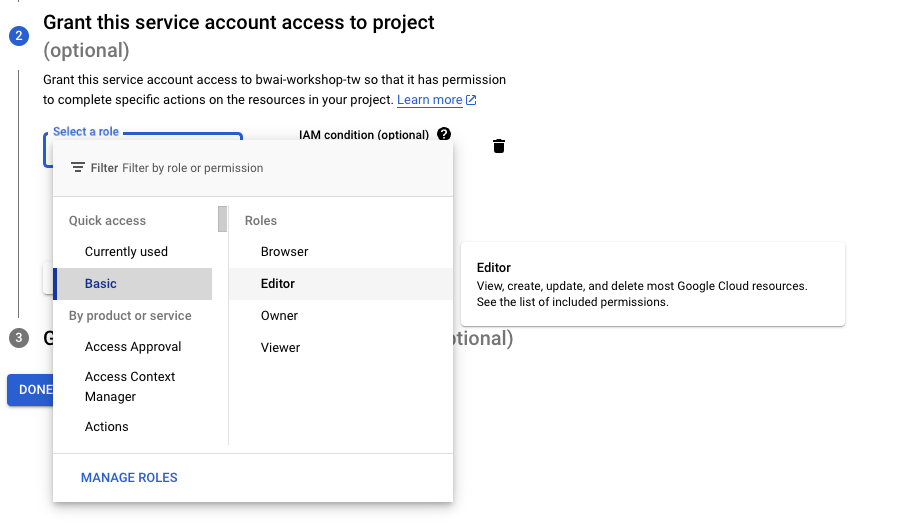
- “Grant users access to this service account” 不需要特別設定
- 按下 “Manage Keys” 來準備下載 Credential
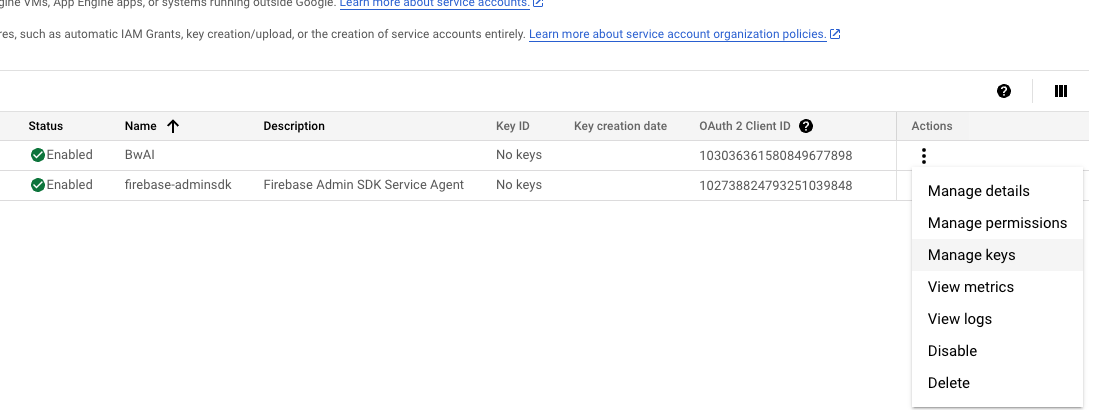
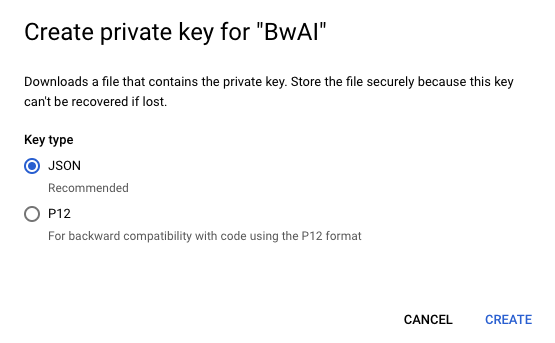
- 選擇 Add Key -> Create new Key -> 下載 JSON
如何在 Google Cloud Function 導入 Services Account Credential ?
接下來會來分享,要如何正確地能夠在 Cloud Function 內使用呢。 如果你想要直接使用 Cloud Function 去開啟 Credential JSON 檔案,你會一直得到無法正確拿到 credential 的錯誤訊息。
這時候需要先透過環境參數來加入:
- 將 JSON 檔案中所有內容複製起來。
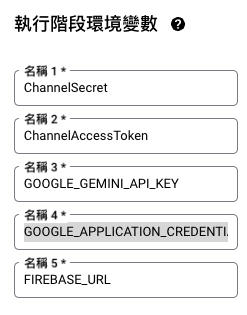
- 為了要能夠正確啟動 Firebase 記得新增一個參數,
FIREBASE_URL並且把剛剛的 Firebase link 網址填上去。 - 設定
GOOGLE_APPLICATION_CREDENTIALS參數,然後把所有內容貼上環境參數。
相關程式碼要如何修改
到了原始碼那邊,記得要更新兩個檔案: (完整程式碼)
- function.go -> function.go
- go.mod -> go.mod
重新 Deploy 之後,就可以來看最新的狀況。
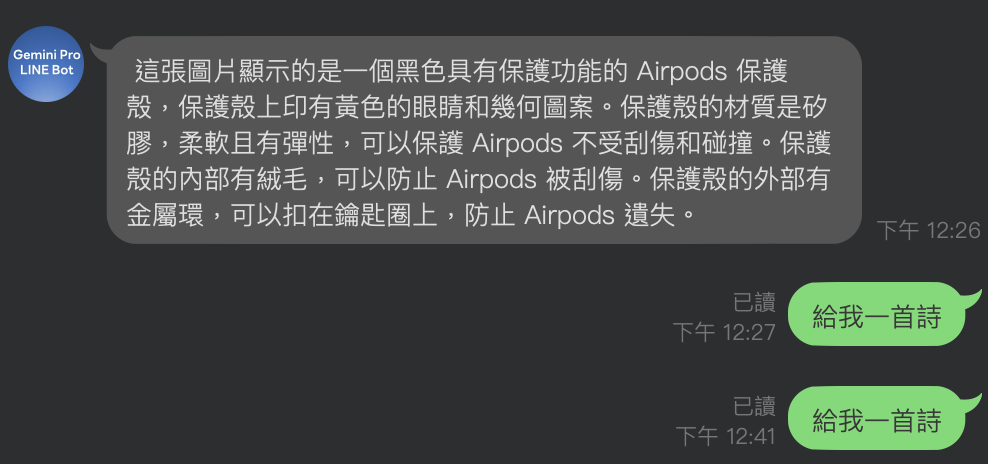
成果與使用 ChatSession 差異:
可以直接看到成果相當的好,並且這樣的記憶長度就會看 Gemini Model Token 的限制,算是相當的好用。
那這個又跟 Gemini Chat Session 有什麼差別呢?
- Chat Session: 適合使用在 Cloud Run 那種有固定一整台 server 的 LINE Bot 應用。
- Firebase Database + Chat Session: 就可以放在 Cloud Function 這種 Functional As A Services 上面。
使用 Golang Google Options 套件需要注意:
雖然已經將 Firebase Realtime Database 設定成每個人都可以讀寫,但是如果是透過 Golang 去存取的時候,你會出現 Unauthorized request 的錯誤訊息。 這時候就是因為你的 JSON 檔案的 Project 跟你的 Firebase Project 是不同的。 只要重新建立一個 Services Account 並且更新 JSON 內容即可。

關於修改程式碼的細節
- 接下來會跟大家講,如何修改相關程式碼?
	// Init firebase related variables
	ctx := context.Background()
	opt := option.WithCredentialsJSON([]byte(os.Getenv("GOOGLE_APPLICATION_CREDENTIALS")))
	config := &firebase.Config{DatabaseURL: os.Getenv("FIREBASE_URL")}
	app, err := firebase.NewApp(ctx, config, opt)
	if err != nil {
		log.Fatalf("error initializing app: %v", err)
	}
	client, err := app.Database(ctx)
	if err != nil {
		log.Fatalf("error initializing database: %v", err)
	}
- 首先
option.WithCredentialsJSON([]byte(os.Getenv("GOOGLE_APPLICATION_CREDENTIALS")))可以讓你從環境參數讀取到 credential 。 - 接下來
&firebase.Config{DatabaseURL: os.Getenv("FIREBASE_URL")}則是將 FIREBASE_URL 內容設定好。 - 這樣就可以正確執行了,接下來要來看相關處理 Gemini 聊天記憶的部分了。
Gemini Pro Chat History 要如何正確處理?
首先也要讓大家了解一下,跟 OpenAI 不同的是: Gemini Chat History 的格式不太一樣(也不是很好了解)。根據網頁資料如下:
[parts {
   text: "In one sentence, explain how a computer works to a young child."
 }
 role: "user",
 parts {
   text: "A computer is like a very smart machine that can understand and follow our instructions, help us with our work, and even play games with us!"
 }
 role: "model"]
不是很確定為何 “parts” 會用集合, anyway 在 Python 中還不算難處理,但是在 Golang 裡面的處理方式如下:(參考自 Google Golang GAI Github https://github.com/google/generative-ai-go)
func ExampleChatSession_history() {
	ctx := context.Background()
	client, err := genai.NewClient(ctx, option.WithAPIKey(os.Getenv("GEMINI_API_KEY")))
	if err != nil {
		log.Fatal(err)
	}
	defer client.Close()
	model := client.GenerativeModel("gemini-1.0-pro")
	cs := model.StartChat()

	cs.History = []*genai.Content{
		&genai.Content{
			Parts: []genai.Part{
				genai.Text("Hello, I have 2 dogs in my house."),
			},
			Role: "user",
		},
		&genai.Content{
			Parts: []genai.Part{
				genai.Text("Great to meet you. What would you like to know?"),
			},
			Role: "model",
		},
	}

	res, err := cs.SendMessage(ctx, genai.Text("How many paws are in my house?"))
	if err != nil {
		log.Fatal(err)
	}
	printResponse(res)
}
問題來了, cs.History 竟然是對應到 []*genai.Content。這並不是一個對於 JSON unmarshall 就能夠直接使用的資料格式。還需要有相關的轉換。
透過 Firebase Database 處理 Chat History 的流程:
這邊稍微讓大家知道一下,由於 Firebase Database 其實就是一大包的 JSON Database 。你可以直接存取一整包的 JSON Structure 進這個資料庫。 這樣來說讓整個資料庫處理上,還有寫小型 POC 應用來說相當的方便。(但是效率是可以討論的)
// Define your custom struct for Gemini ChatMemory
type GeminiChat struct {
	Parts []string `json:"parts"`
	Role  string   `json:"role"`
}

.....

	// Get chat history from Firebase
	var InMemory []GeminiChat
	err = fireDB.NewRef("BwAI").Get(ctx, &InMemory)
	if err != nil {
		fmt.Println("load memory failed, ", err)
	}

	fmt.Println("InMemory: %v", InMemory)

	// convert InMemory to Memory
	for _, c := range InMemory {
		parts := make([]genai.Part, len(c.Parts))
		for i, part := range c.Parts {
			parts[i] = genai.Text(part)
		}
		dst := &genai.Content{
			Parts: parts,
			Role:  c.Role,
		}

		Memory = append(Memory, dst)
	}
上面是從 Firebase Database 取出後需要轉換的程式碼,但是使用方式則是直接將 Memory 直接交給 chat.History 即可。需要記得的是,在處理完之後,要把這一次的對話也放進 Memory之中。部分程式碼如下:
				// Pass the text content to the gemini-pro model for text generation
				model := client.GenerativeModel("gemini-pro")
				cs := model.StartChat()
				cs.History = Memory

				res, err := cs.SendMessage(ctx, genai.Text(req))
				if err != nil {
					log.Fatal(err)
				}
				var ret string
				for _, cand := range res.Candidates {
					for _, part := range cand.Content.Parts {
						ret = ret + fmt.Sprintf("%v", part)
						log.Println(part)
					}
				}

				// Save the conversation to the memory
				Memory = append(Memory, &genai.Content{
					Parts: []genai.Part{
						genai.Text(req),
					},
					Role: "user",
				})

				// Save the response to the memory
				Memory = append(Memory, &genai.Content{
					Parts: []genai.Part{
						genai.Text(ret),
					},
					Role: "model",
				})

				// Save the conversation to the firebase
				err = fireDB.NewRef("BwAI").Set(ctx, Memory)
				if err != nil {
					fmt.Println(err)
					return
				}
重點就在:
- 要把之前講過的話,放入 History
- 把現在講過的,直接丟給
cs.SendMessage() - 最後要記得把後來使用者輸入的文字,跟 Gemini 回覆的文字都加入
Memory。
錯誤處理
Q: 如果從第一篇的文章做過來,改了 FIREBASE_URL 與 GOOGLE_APPLICATION_CREDENTIALS 之後,反而傳訊息都不會回覆了?
A: 請幫我做以下檢查:
- 傳遞一個圖片訊息,看看有沒有回覆。
- 如果圖片有回覆,那麼就是你的 Services Account 設定權限跟 Firebase 不同。
Q: 怎麼本來可以對話? 但是忽然沒有回覆了? 查看 Log 卻出現 unknown field “usageMetadata”
這是因為由於 Google Gemini 伺服器今天早上修改相關變動,但是 Golang 官方套件還無法來得及改動。 (https://github.com/google/generative-ai-go/issues/97)
目前這部分程式碼有透過直接換成 新版本的程式碼。
接下來:
感謝各位的支持,接下來就是要透過 Gemini Vision 去識別並且翻譯收據。還要讓 Gemini 可以快速幫我們找出哪時候買的? 什麼地方買的? 當初花了多少錢的「收據小幫手」。
完整原始碼
你可以在這裡找到相關的開源程式碼: https://github.com/kkdai/linebot-cf-firebase

