
May 5th, 2024


前情提要:
雖然我近期已經把所有服務都已經從 Heroku.com 搬遷到 GCP 上面,但是 Render.com 本來也是我教學的一個方案。畢竟它擁有不需要信用卡,有免費額度可以讓學生們快速上手。 這邊快速記錄一下該如何透過 Github Action 部署 Golang 服務到 Render.com 的流程。
如果啟動部署,流程會是:
- 完成 PR Merged 之後
- Draft a Release 在 Github 上面
- 然後會啟動自動部署到 Render.com
範例程式碼:
可以參考這個 REPO https://github.com/kkdai/linebot-food-enthusiast
如何開始設定 Github Continuous Deployment
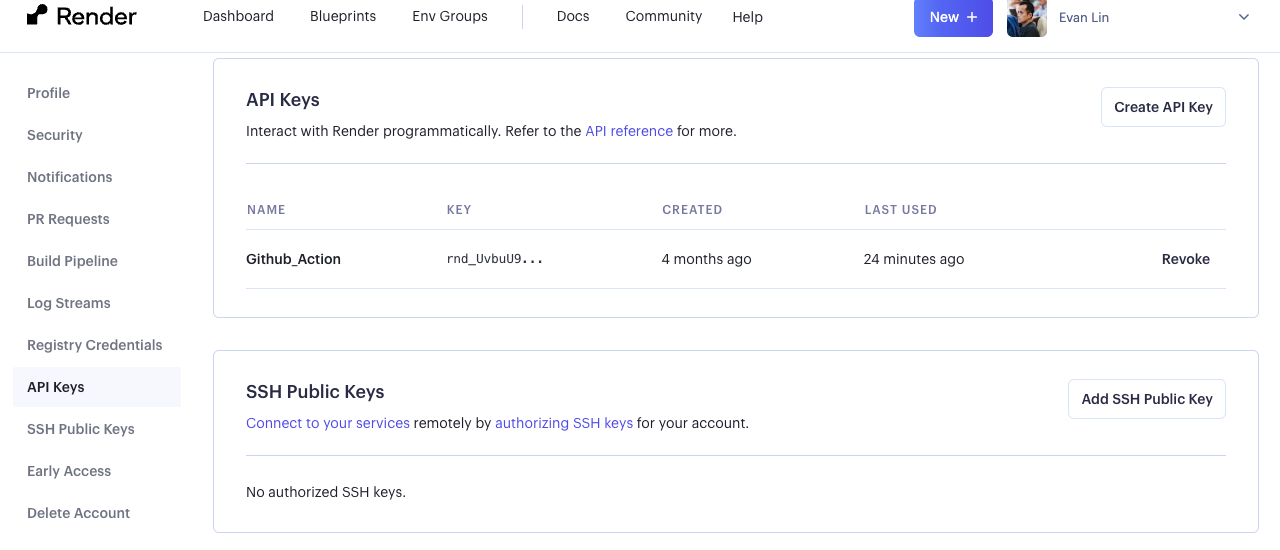
1. 取得 Render.com API Key
-
再來你需要取得你要部署的 Render Services ID,進入專案後,直接看網址就知道。 下面的
srv-xxxxx就是你的專案 ID。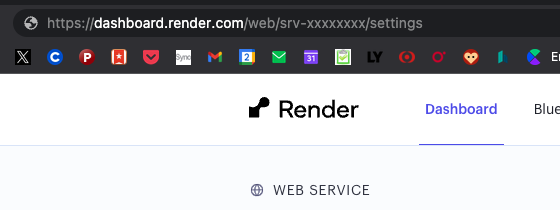
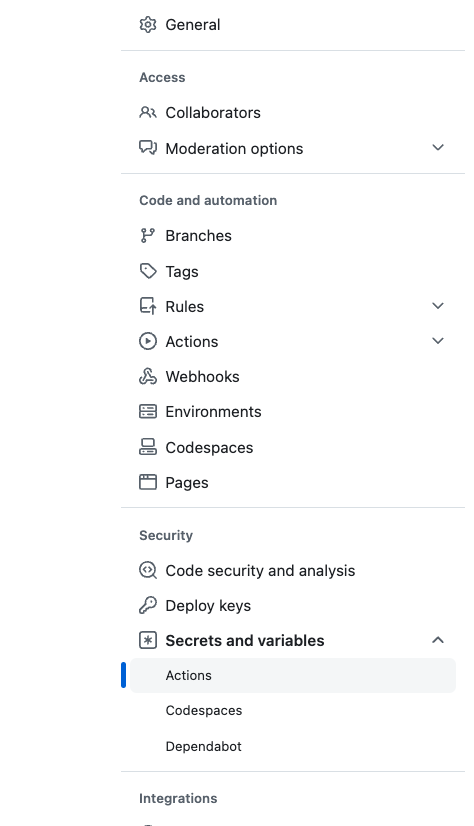
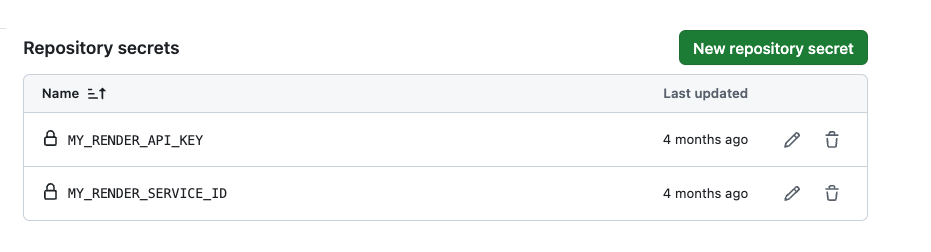
2. Render.com API Key 跟 Services ID 填寫到 Github 設定
你到你專案的設定 Secrets and Variables -> Actions
3. render config file render.yaml
放在 github 根目錄
services:
- type: web
  name: linebot-food-enthusiast
  env: go
  buildCommand: go build -o app
  startCommand: ./app
  plan: free
  autoDeploy: false
  envVars:
  - key: ChannelAccessToken
    sync: false
  - key: ChannelSecret
    sync: false
  - key: GOOGLE_GEMINI_API_KEY
    sync: false
4. render.com Github Action
放在 https://github.com/kkdai/linebot-food-enthusiast/blob/main/.github/workflows/render_deploy.yml
name: Render Deploy

on:
  release:
    types: [created]

jobs:
  build:
    runs-on: ubuntu-latest
    steps:
      - name: Deploy to production
        uses: johnbeynon/[email protected]
        with:
          service-id: $
          api-key: $
          wait-for-success: true
其他 Q&A
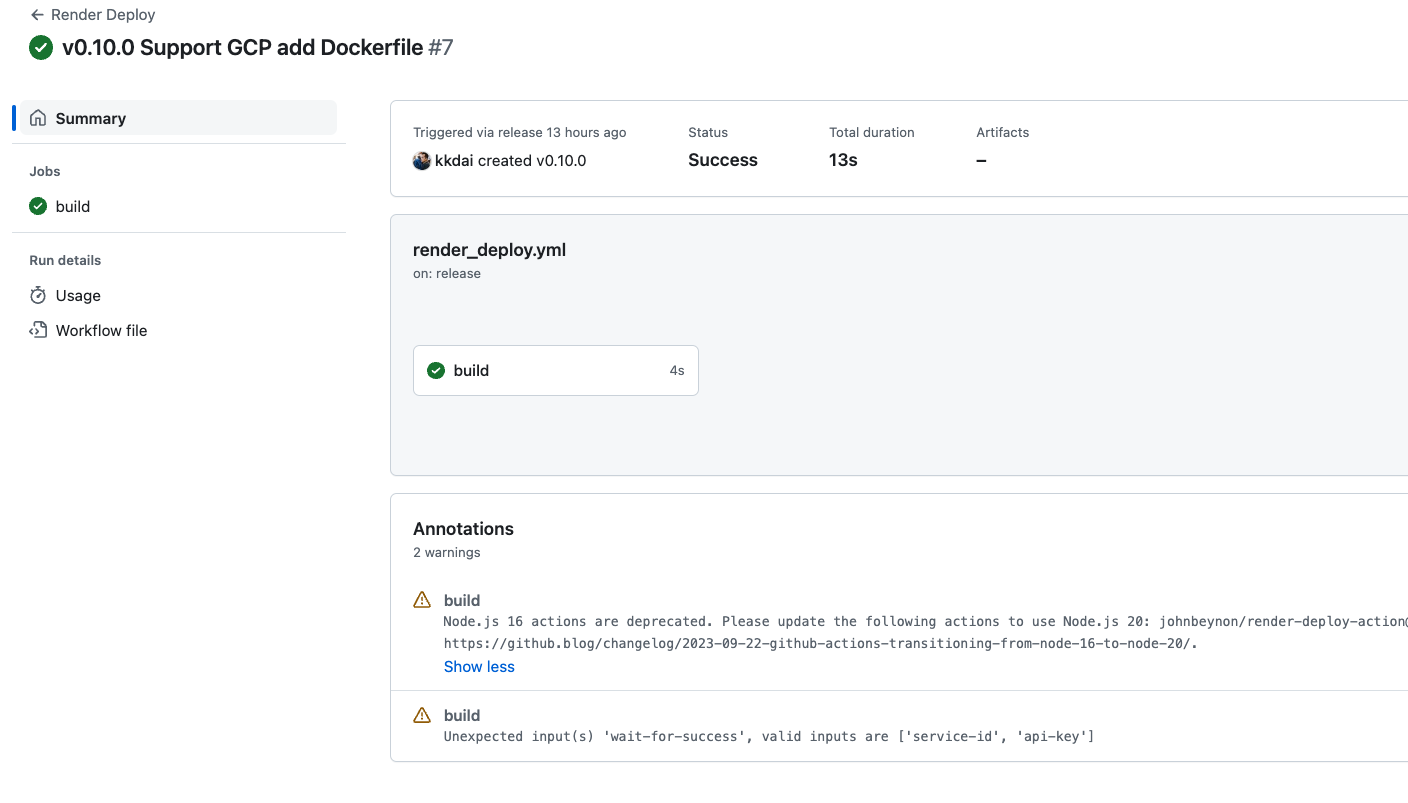
Q: 看到有一些錯誤顯示,那是否有問題?
A: 目前不會造成部署的錯誤,但是會有錯誤訊息發生。

- Refer
參考文章: