
July 21st, 2016


![]()
使用 Google Kubernetes Engine (Container Enginer)
由於剛學完 Udacity 上面的 “Scalable Microservices with Kubernetes” 接下來的例子主要是課堂上有教的部分.
先使用 Container Enginer 來建立一個新的 Container Cluster
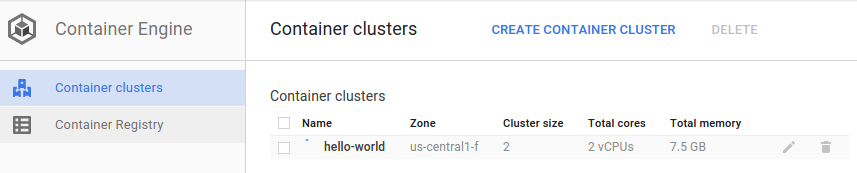
(P.S. 你需要記住你的 GKE 名稱 (ex: mygke))
透過 kubectl 來連接你的 Cotainer Cluster
gcloud container clusters get-credentials mygke
建立一個具有 TLS 的 nginx 連線
建立 TLS
確認你已經有 key
ls tls
> ca-key.pem ca.pem     cert.pem   key.pem
使用 kubectl 建立一個 tls secret
kubectl create secret generic tls-certs --from-file=tls/
> secret "tls-certs" created
顯示 tls secret 的內容
kubectl describe secrets tls-certs

> Name:		tls-certs
> Namespace:	default
> Labels:		<none>
> Annotations:	<none>
>
> Type:	Opaque
>
> Data
> ====
> ca-key.pem:	1679 bytes
> ca.pem:		1180 bytes
> cert.pem:	1249 bytes
> key.pem:	1675 bytes
建立一個給 nginx proxu 的 config map
kubectl create configmap nginx-proxy-conf --from-file=nginx/proxy.conf

> configmap "nginx-proxy-conf" created
詳細了解 nginx-proxy-conf configmap
kubectl describe configmap nginx-proxy-conf

> Name:		nginx-proxy-conf
> Namespace:	default
> Labels:		<none>
> Annotations:	<none>

> Data
> ====
> proxy.conf:	176 bytes
建立一個 ngix 的 pod file
準備一下 secure-monolith pod file
vi secure-monolith.yaml
詳細內容如下:
apiVersion: v1
kind: Pod
metadata:
  name: "secure-monolith"
  labels:
    app: monolith
spec:
  containers:
    - name: nginx
      image: "nginx:1.9.14"
      lifecycle:
        preStop:
          exec:
            command: ["/usr/sbin/nginx","-s","quit"]
      volumeMounts:
        - name: "nginx-proxy-conf"
          mountPath: "/etc/nginx/conf.d"
        - name: "tls-certs"
          mountPath: "/etc/tls"
    - name: monolith
      image: "udacity/example-monolith:1.0.0"
      ports:
        - name: http
          containerPort: 80
        - name: health
          containerPort: 81
      resources:
        limits:
          cpu: 0.2
          memory: "10Mi"
      livenessProbe:
        httpGet:
          path: /healthz
          port: 81
          scheme: HTTP
        initialDelaySeconds: 5
        periodSeconds: 15
        timeoutSeconds: 5
      readinessProbe:
        httpGet:
          path: /readiness
          port: 81
          scheme: HTTP
        initialDelaySeconds: 5
        timeoutSeconds: 1
  volumes:
    - name: "tls-certs"
      secret:
        secretName: "tls-certs"
    - name: "nginx-proxy-conf"
      configMap:
        name: "nginx-proxy-conf"
        items:
          - key: "proxy.conf"
            path: "proxy.conf"
透過檔案來建立 pod
kubectl create -f secure-monolith.yaml
顯示 pod 的狀態
kubectl get pods secure-monolith

> NAME              READY     STATUS    RESTARTS   AGE
> secure-monolith   2/2       Running   0          13m
設定你本機電腦的 port 連接到該 pod
kubectl port-forward secure-monolith 10443:443
透過 curl 來做 https 連接測試
curl --cacert tls/ca.pem https://127.0.0.1:10443

> {"message":"Hello"}
顯示更多詳細的 log
kubectl logs -c nginx secure-monolith

> 127.0.0.1 - - [22/Jul/2016:16:56:21 +0000] "GET / HTTP/1.1" 200 20 "-" "curl/7.43.0" "-"
參考安裝教學